Getting Started with Botson
Learn how to configure each plugin, set up your workflow, and get the most out of the Botson platform. Each section below covers a different feature with step-by-step guidance.
Preflight & Proof
Automated quality checks, proofing, and customer approval workflow
Overview
The Preflight plugin runs over 100 automated checks on your Illustrator artwork — verifying colors, fonts, bleeds, barcodes, image resolution, overprint settings, and more. Issues are flagged with severity levels and many can be auto-fixed with one click. You can create custom preflight profiles to match your shop's specific requirements.
Configuring Preflight Settings
Open the Preflight panel in Illustrator and click the settings gear icon. From here you can configure which check categories are enabled, set thresholds (e.g., minimum image resolution, bleed distances), and create named profiles for different job types. Profiles can be shared across your team so everyone uses the same standards.
Generating Proofs
After running preflight, you can generate a high-quality PDF proof directly from the plugin. The proof includes all artwork layers, ink separations, and any annotations. Proofs can be saved locally or sent to customers for approval through the Proofing Portal.
Screenshot: Proof generation
Proofing Portal — Customer Approval Workflow
The Proofing Portal is a web-based tool that lets you send proofs to your customers for review and approval. When you send a proof, the customer receives an email with a secure link. They can view the proof in their browser, leave comments or annotations on specific areas, and either approve or request changes — all without needing any special software.
You can track the status of all sent proofs from your Proofing dashboard, see when customers viewed the proof, and get notified when they approve or request revisions.
Screenshot: Proofing Portal customer view
Botson Art Server
Centralized file management and artwork storage
Overview
The Botson Art Server provides centralized file management for your artwork. It organizes jobs, customers, and art files in a structured folder system that integrates directly with the Illustrator plugins. When you save or export from a plugin, files are automatically organized into the correct customer and job folders.
File Organization
The Art Server structures files by customer and job. Each customer folder contains their jobs, and each job folder holds the artwork files, proofs, and any related assets. This makes it easy to find files later and keeps everything organized without manual folder management.
Plugin Integration
The Illustrator plugins connect to the Art Server to save and retrieve files. When you open a job in the plugin, it automatically pulls the associated artwork. When you generate proofs or export files, they're saved back to the correct location on the Art Server.
Screenshot: Plugin file browser connected to Art Server
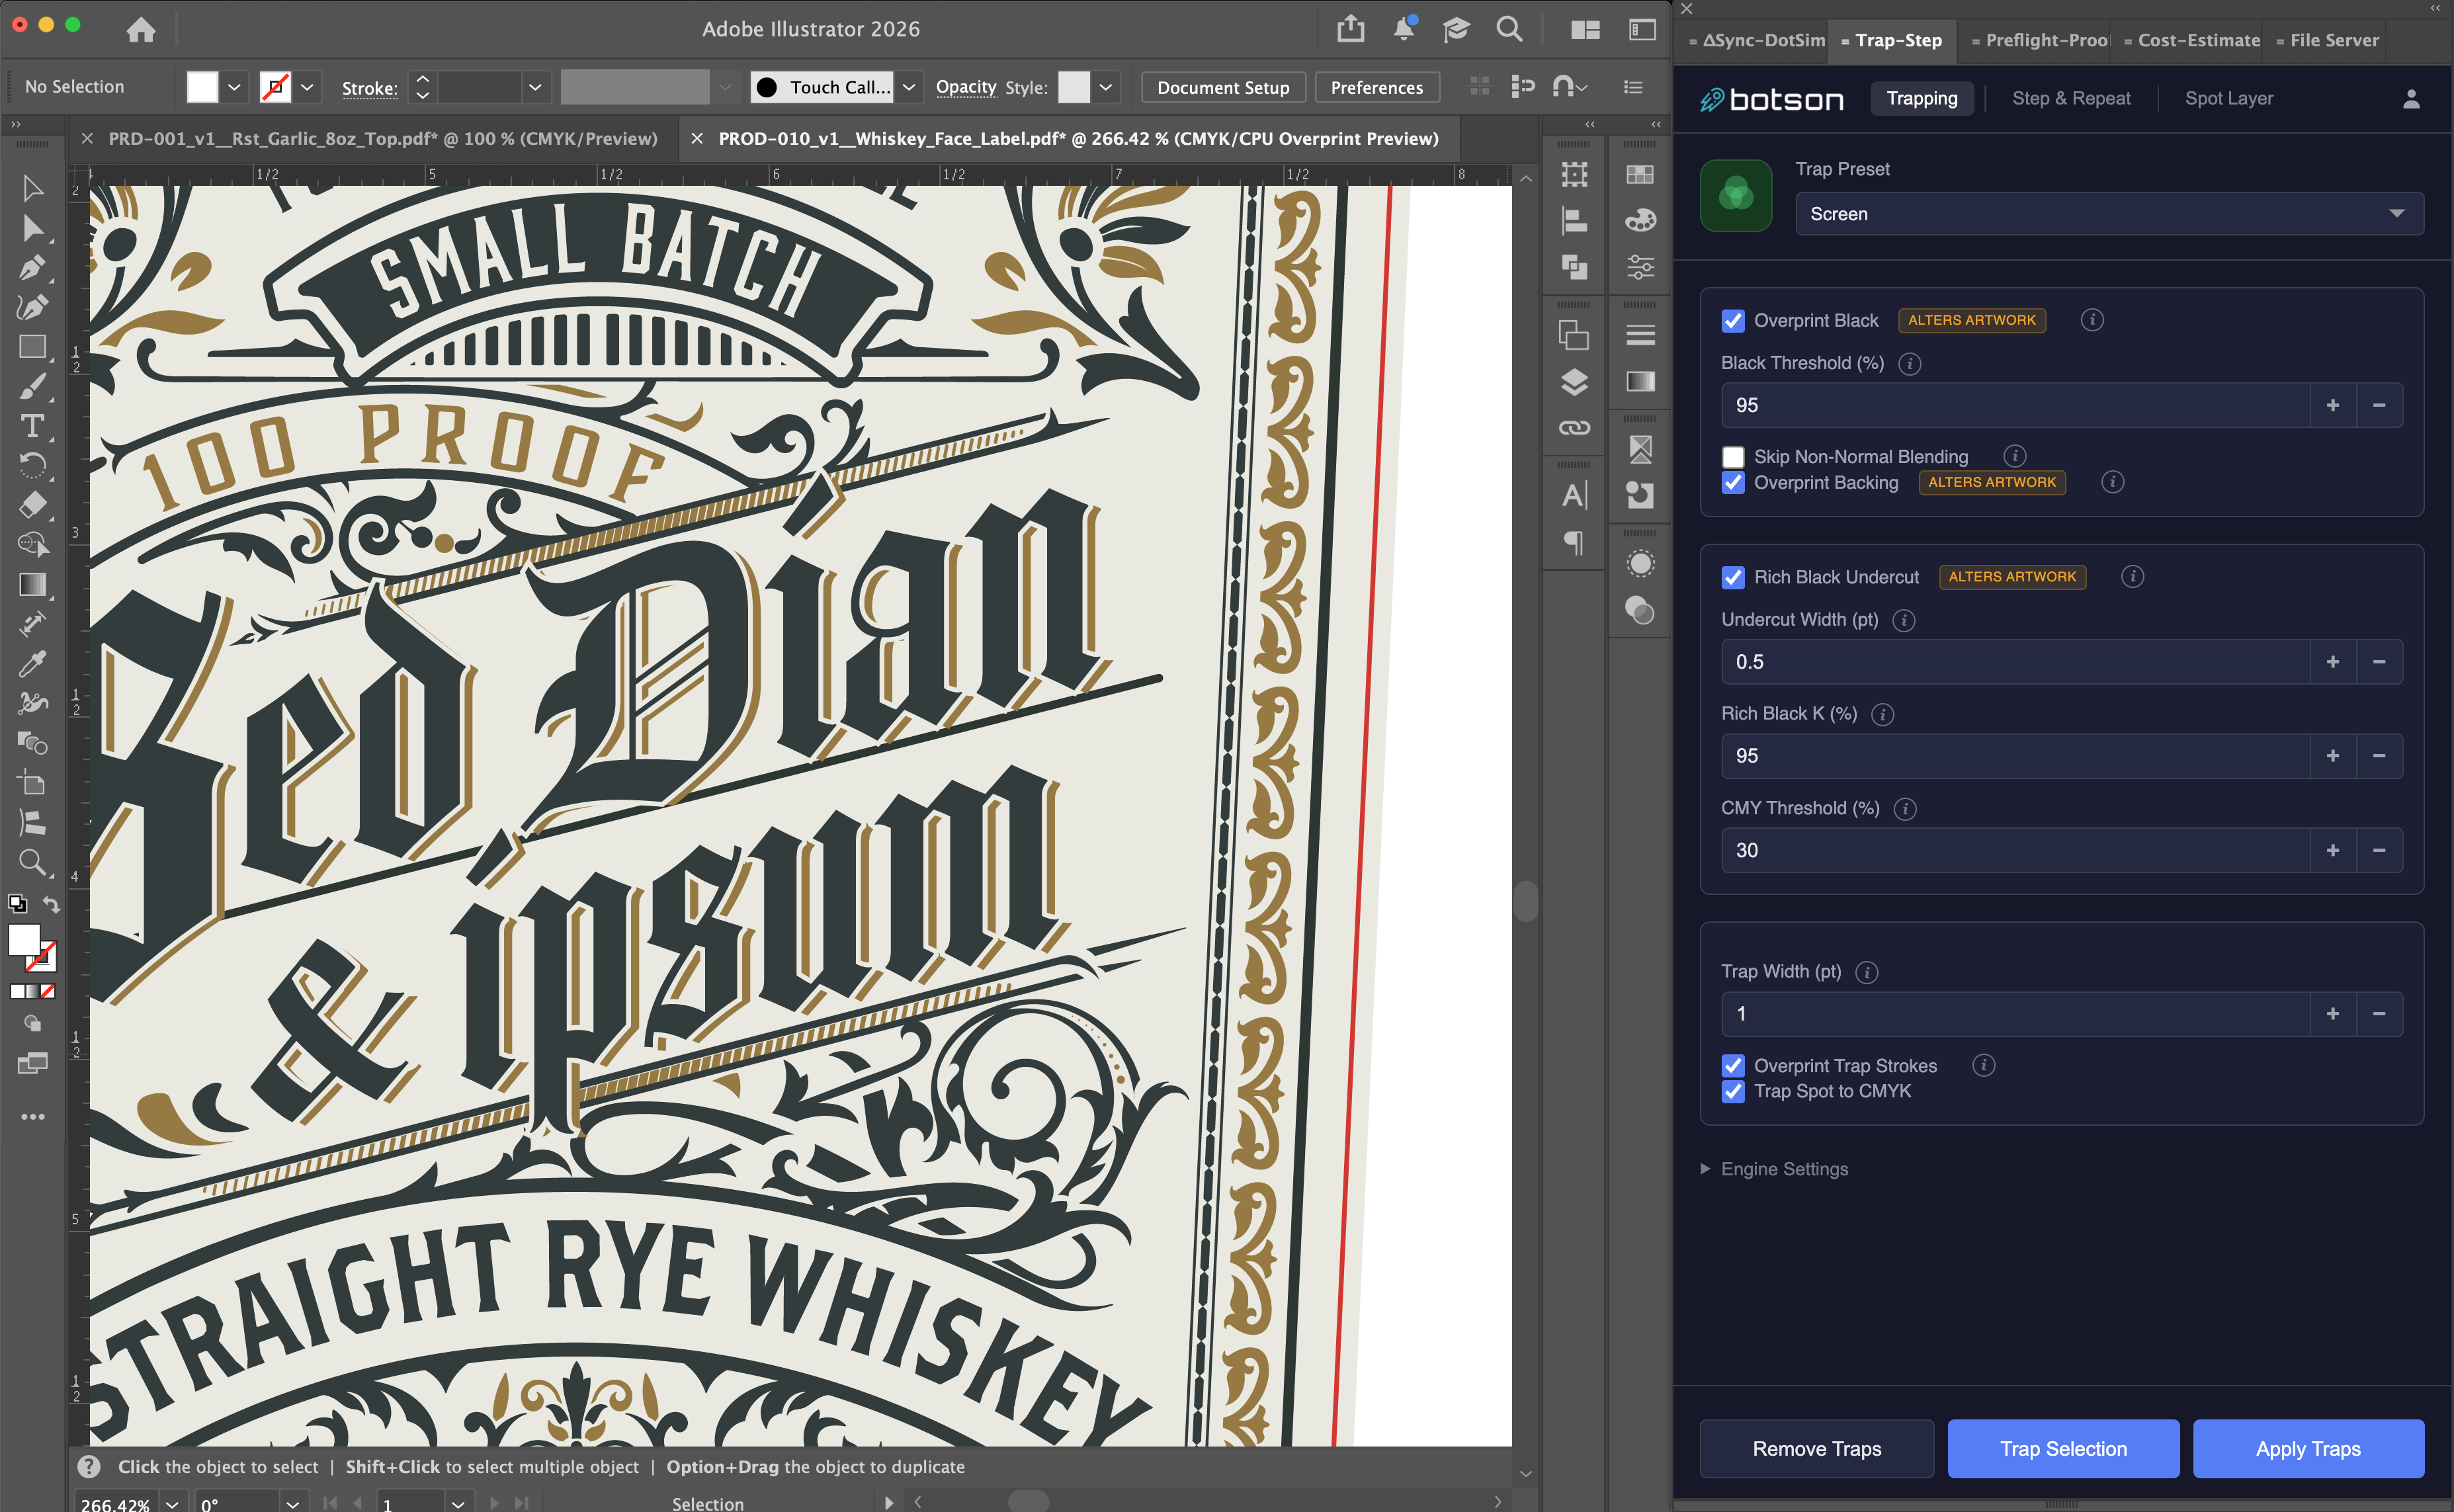
Trap & Repeat
Automated trapping and step-and-repeat layout
Overview
The Trap & Repeat plugin handles two critical prepress tasks: applying trapping to prevent registration gaps between colors, and creating step-and-repeat layouts for gang printing. Both processes are automated to save time and reduce errors.
Trapping
Configure trap widths, trap direction rules, and which colors to trap against. The plugin analyzes your artwork and applies traps automatically based on your settings. You can set default trap values for your shop and override them per-job when needed.
Step & Repeat
Create step-and-repeat layouts by selecting a die from your die database or entering dimensions manually. The plugin calculates optimal placement, handles gutters, and generates the final layout ready for output. You can save die configurations for reuse across jobs.

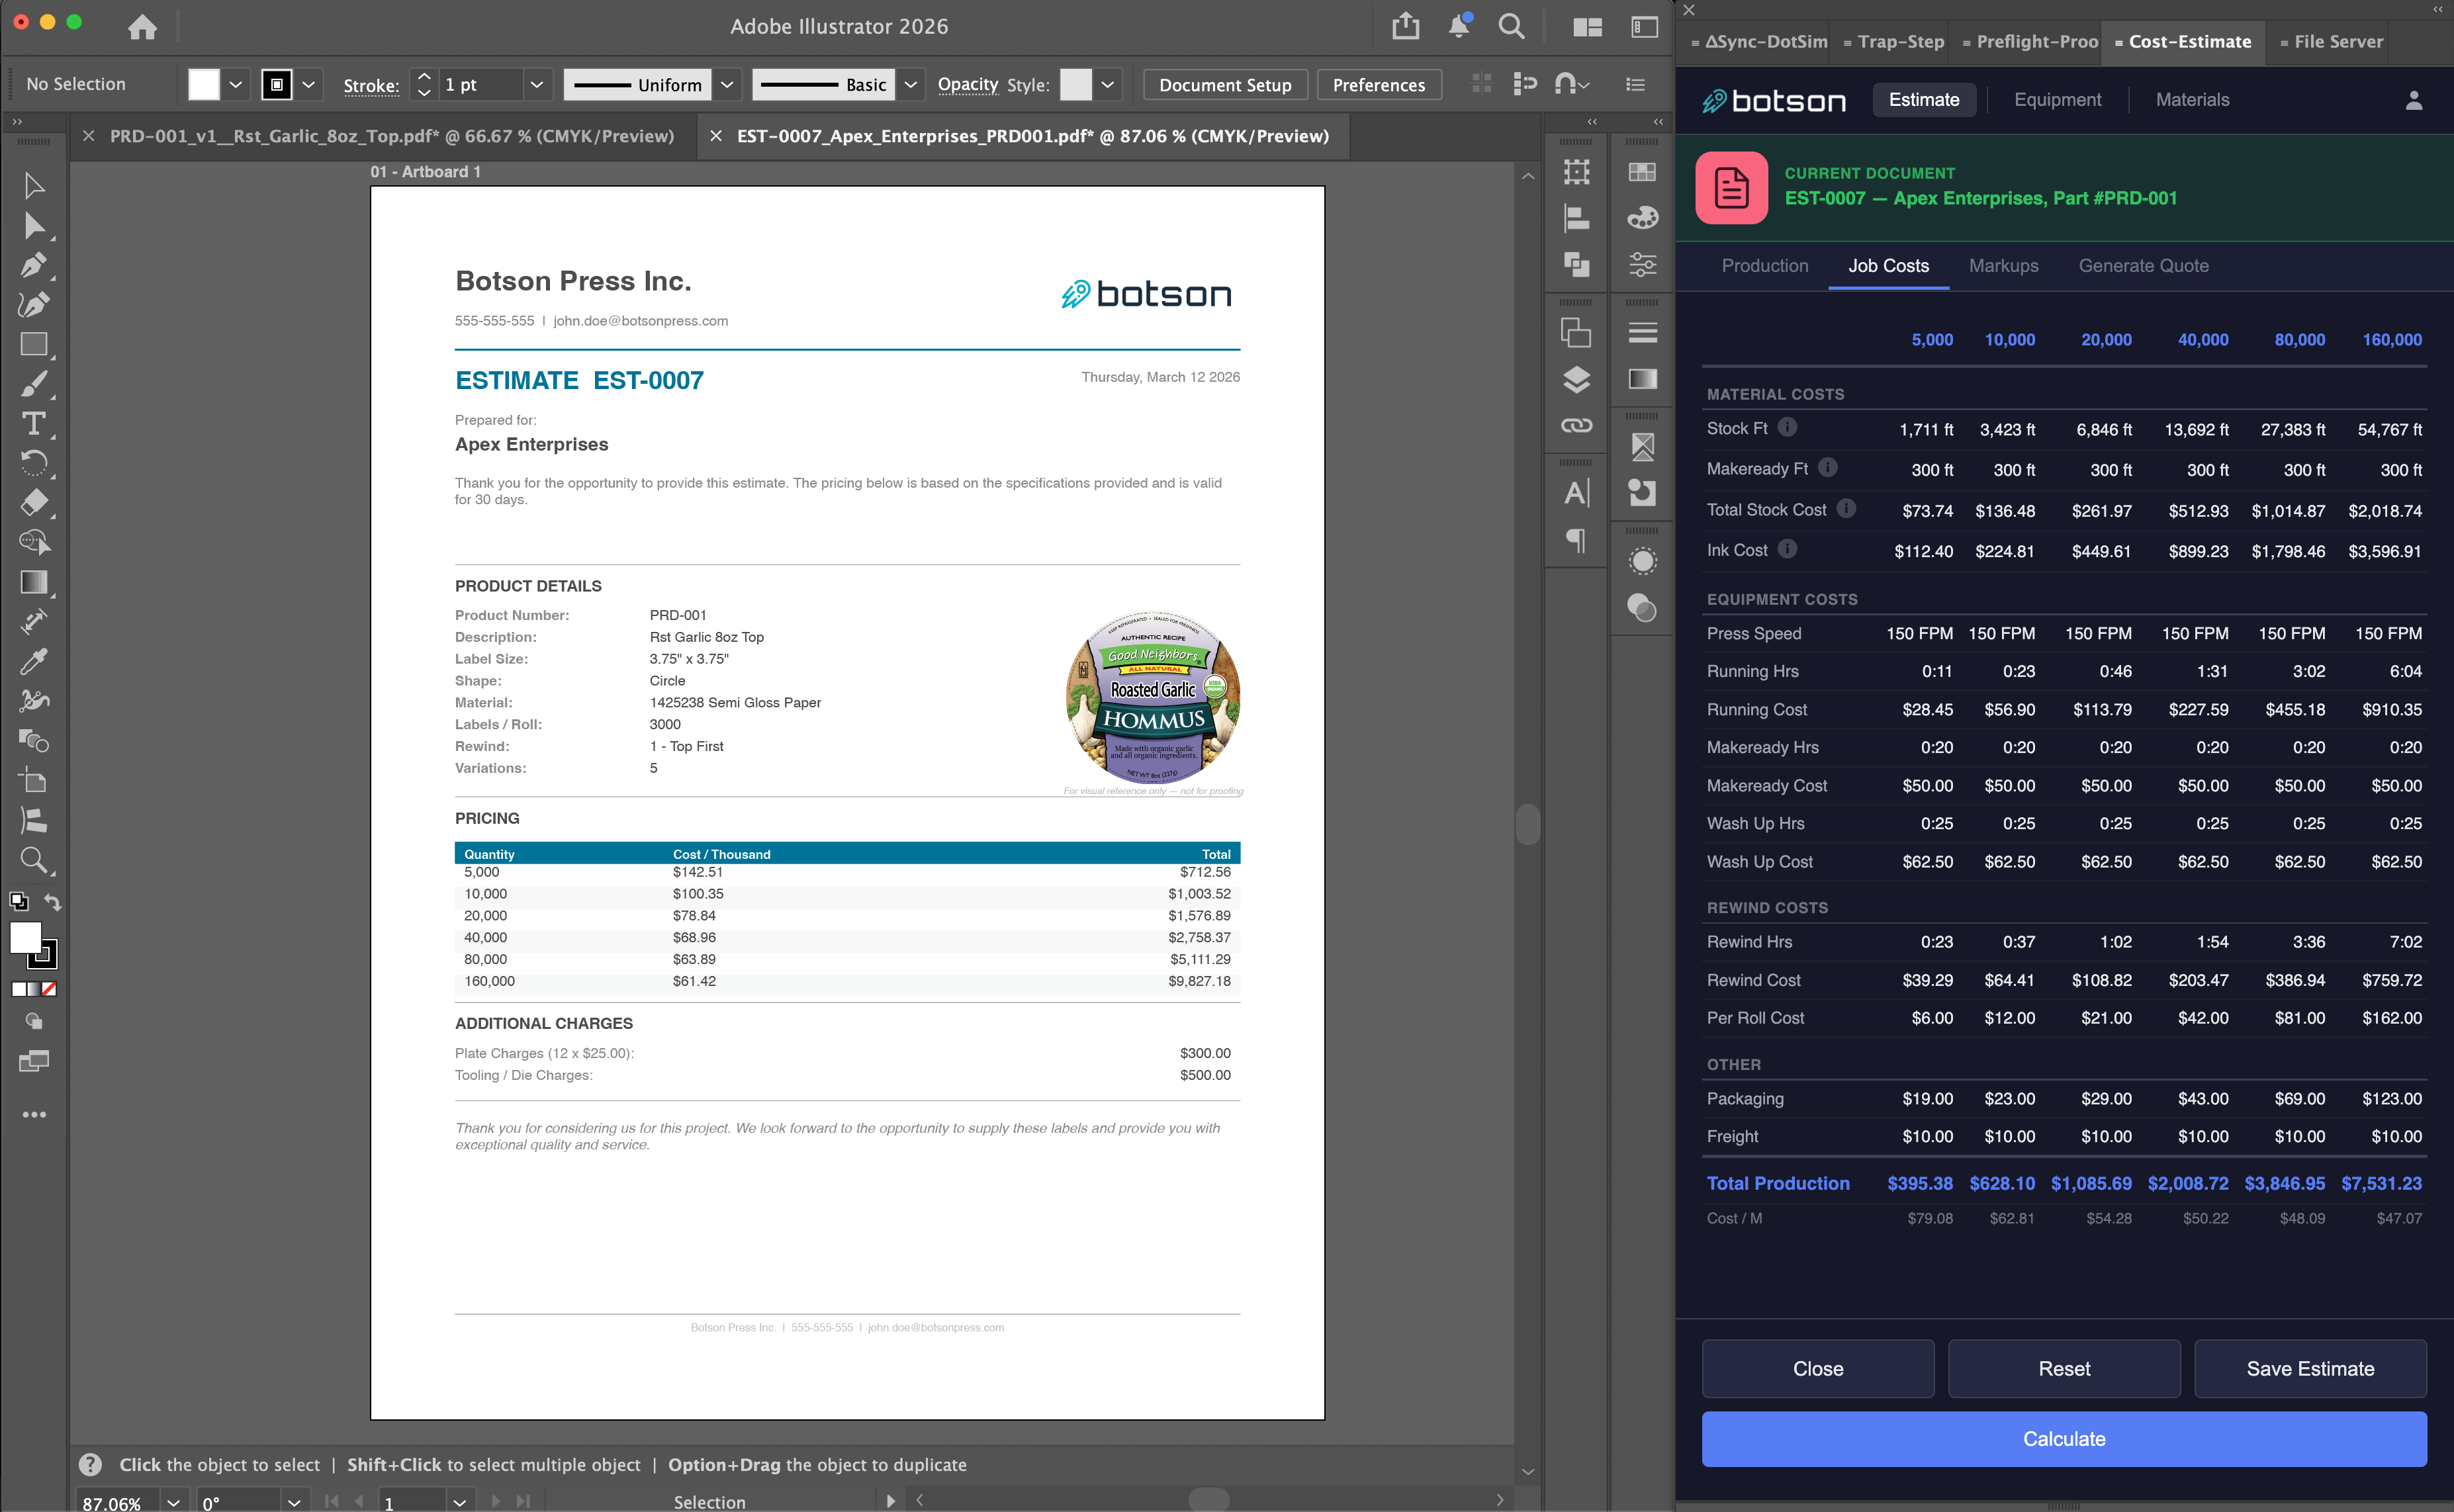
Estimate
Job estimating and quoting
Overview
The Estimate plugin lets you generate accurate job quotes directly from Illustrator. Enter job specifications like substrate, inks, quantity, and finishing options, and the plugin calculates pricing based on your configured rates.
Setting Up Pricing & Materials
Before creating estimates, configure your materials database with substrates, inks, laminates, and other consumables. Set up your pricing structure including setup fees, per-unit costs, and quantity breaks. These settings are shared across your team so everyone quotes consistently.

Creating an Estimate
With a document open, launch the Estimate panel and fill in the job specs. The plugin can auto-detect some parameters from the artwork (like dimensions and ink count). Review the calculated price, adjust as needed, and export the quote as a PDF or save it to the Art Server.
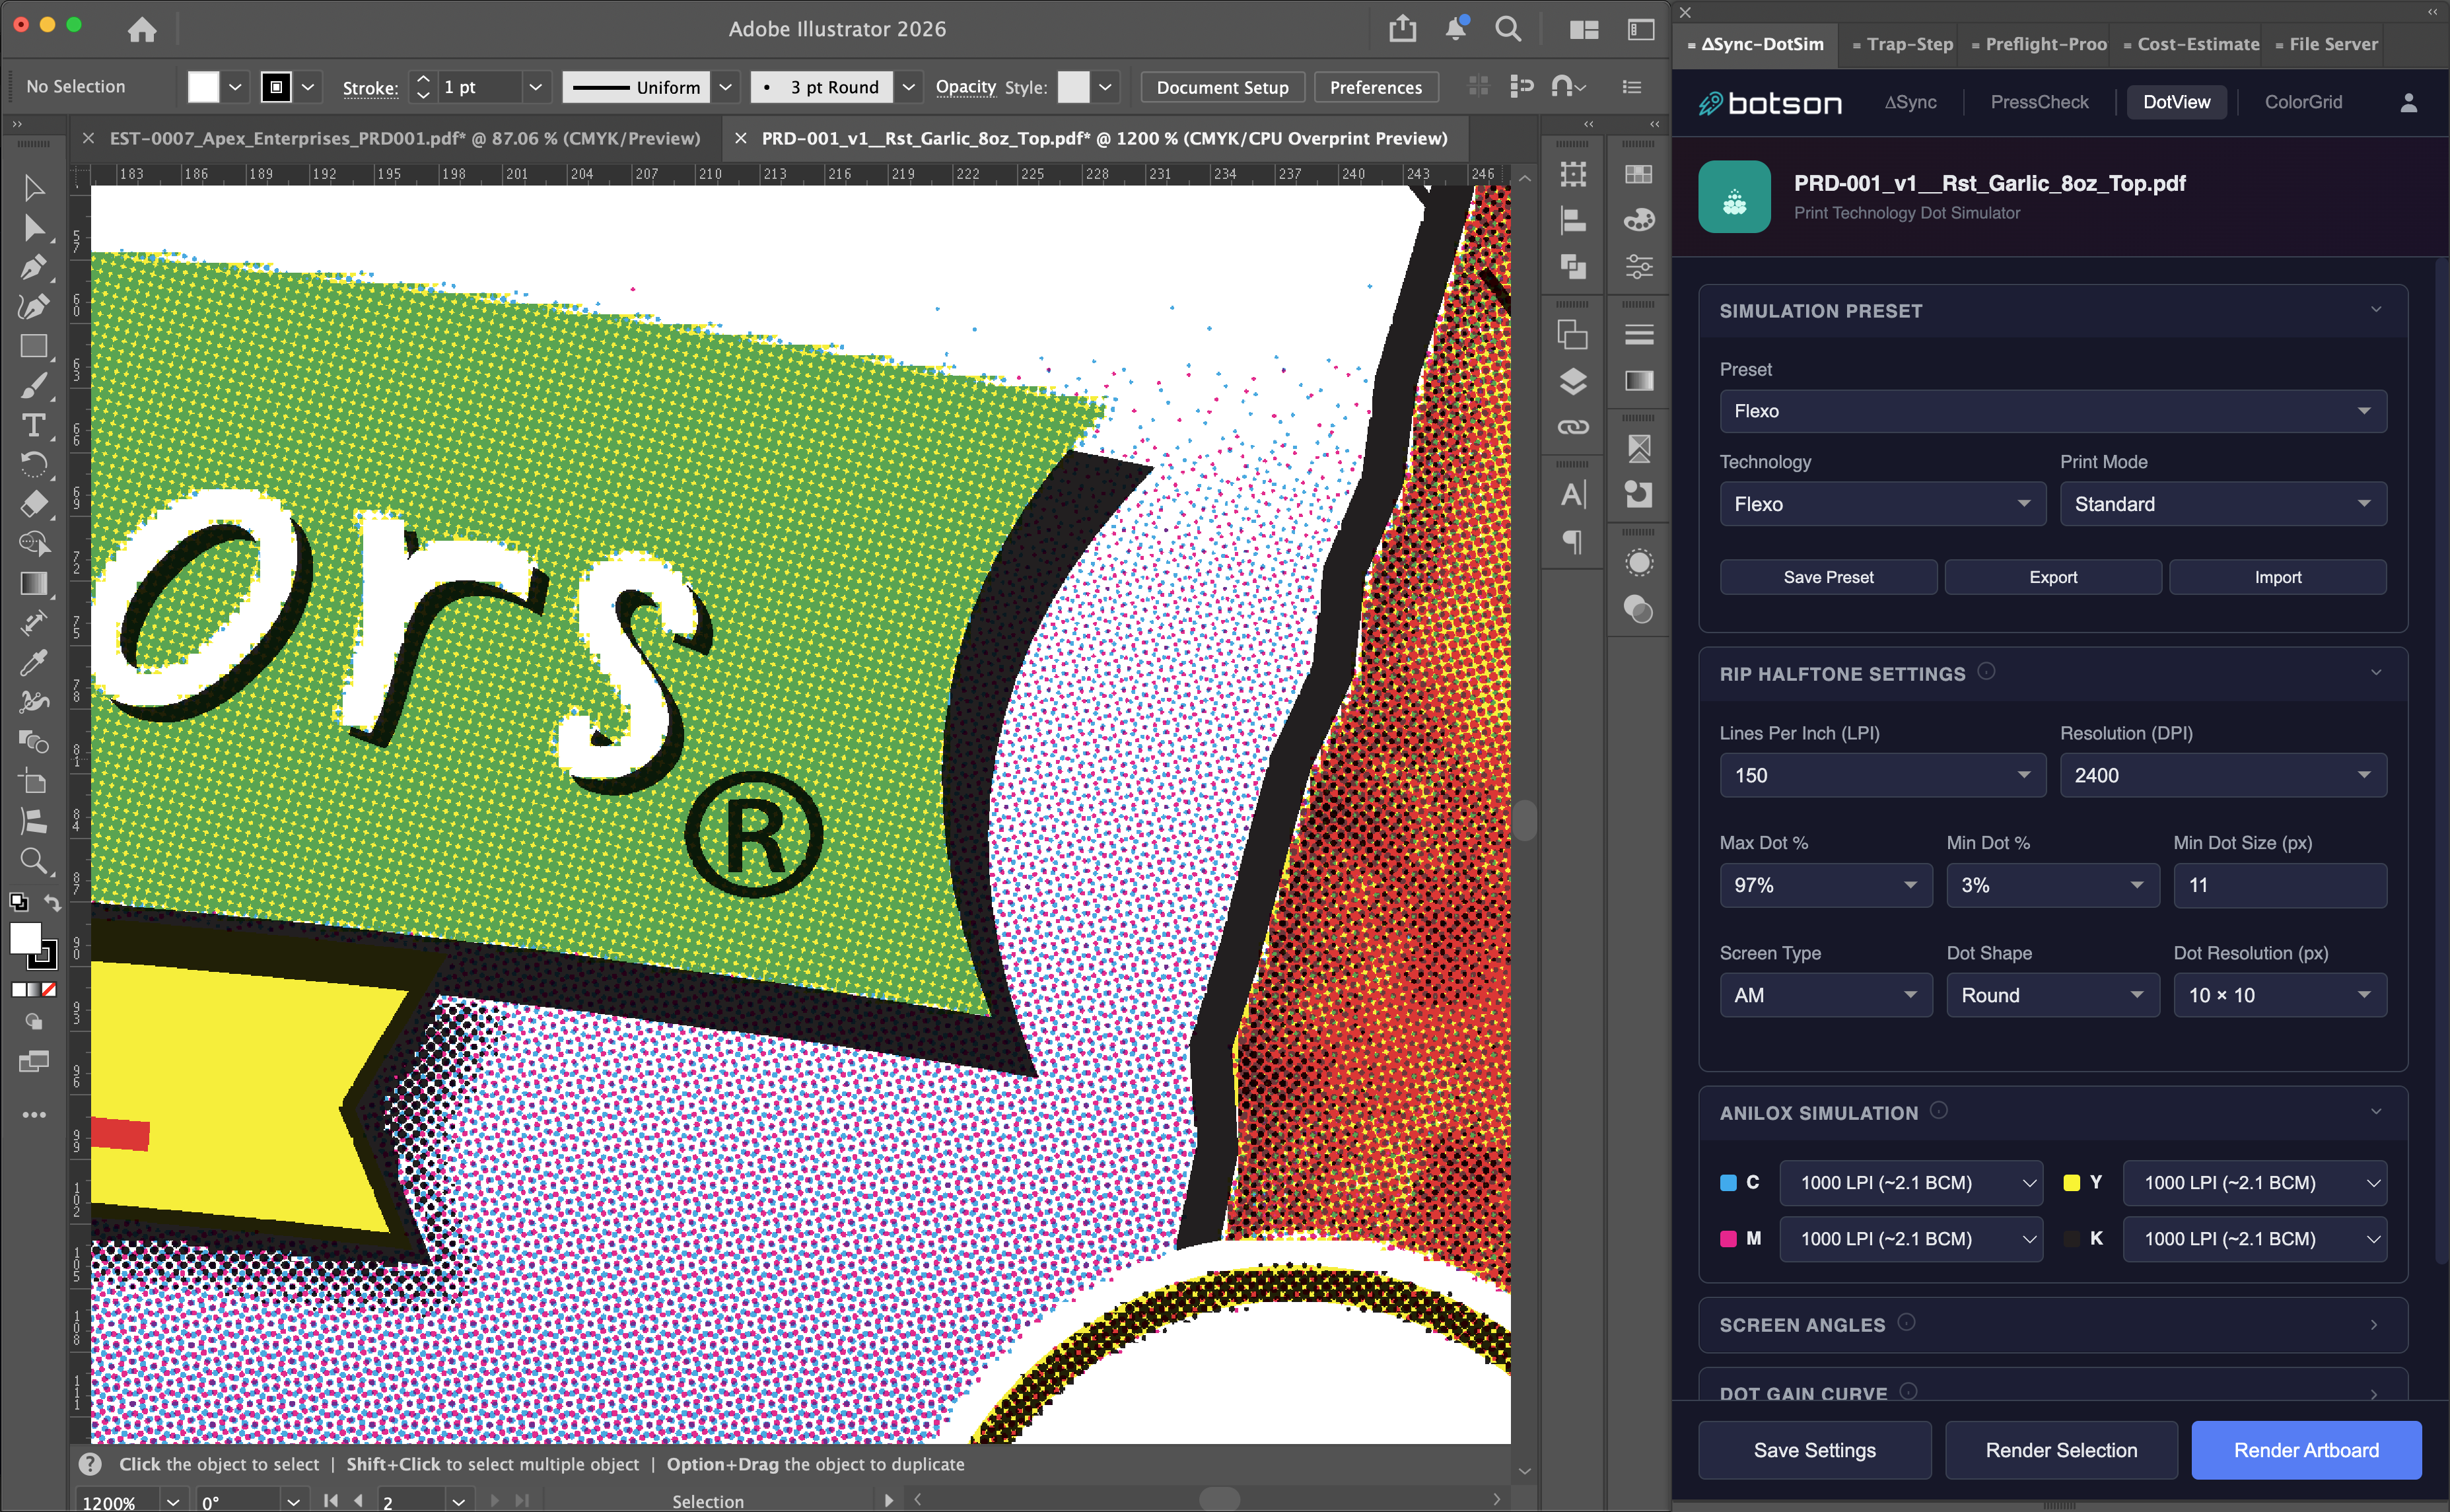
ΔSync
Press-side color verification, dot pattern simulation, and press profile calibration
DotView (Dot Simulation)
DotView simulates how your artwork will look when printed with halftone dots at various screen rulings, angles, and dot shapes. This helps prepress operators and customers visualize the final print result before going to press.
ΔSync (Color Verification)
ΔSync is a press-side color verification system. It allows press operators to measure and track color consistency during a print run using a mobile device or tablet.
Setting Up ΔSync Devices
Each ΔSync subscription includes 3 device seats (additional seats can be purchased from the billing page). To register a device:
- Create a press profile in the ΔSync plugin and generate a QR code
- On the mobile device, open the ΔSync web app and scan the QR code
- Enter the operator name to register the device
- The device is now linked to your account and ready to take measurements

Operator Workflow
Once registered, press operators use ΔSync to take color readings during a run. Measurements are synced back to the ΔSync system in real time, allowing prepress to monitor color accuracy and make adjustments as needed. Historical data is stored per press profile for trend analysis.
Need help or have feature requests? Visit the support page.